Friday 22 November 2019

Simulating Lots of Things with Objects and Classes

This month's Cornwall meetup was an introduction to objects and classes, a technique that allows us to intuitively and easily model many many similar things.


The slides for the tutorial are here: [link].


Approach

This session was a continuation of our journey learning creative coding for beginners, specifically with the p5js javascript language using openrprocessing.org. Over months we have worked through key topics such as colour models and recursion from this course designed for newcomers:


Object oriented programming (OOP) is important in the world of programming, and can be very useful for creative coding. Is sometimes seen as complicated, plagued by jargon and without clear reasons for using them.

So the approach taken here is to start with a very simple familiar example, and then try to scale that until we hit a challenge, to which the the solution is objects and classes.


A Simple Moving Ball

We started with the simplest example of a ball displayed on the screen as a circle. We talked about the information that ball required - its location in terms of x and y coordinates, for example.

We then considered how the ball might move, with additional information required about its speed in the horizontal and vertical directions. We considered some very simple code that animated this movement - you can explore the code here: (sketch).

Finally we considered how we might simulate the effect of gravity. Whereas speed updates location, gravity updates speed - a simple way to think about the physics without exploring Newton's equations of motion.


This gave more realistic motion of a ball thrown up and then falling.


You can  explore the code here - (sketch).

So far we have very simple familiar code that models a ball in motion under gravity.


Challenge - Lots of Balls

If we wanted to model, not one but 10, or 100, or even 1000 balls, how would be do that?

We don't want to have 1000 different x and y variables to code individually.

One way of minimising duplication is to take advantage of commonality in the many things we're modelling.


We can see that all these balls have (x,y) coordinates and (x_speed, y_speed) information. They also happen to be the same colour and size.

So we can take these common things and include them into a blueprint.


That blueprint we can make many instances of the ball, each with their own position and velocity. The actual numbers for position and velocity can be different but they all have this information.

This is the basic idea of object oriented programming. We define blueprints, from which we can make many instances.

Conceptually, that's how we solve the challenge of modelling many balls.


Classes and Objects

In programming languages, the blueprints are often called classes. And instances created from a class are called objects.

The classes can contain information like position and velocity. These are just like normal variables, but associated with the class. This information is often called object or class data.

Classes can also contain functions! Yes, that's right. A blueprint for a a thing, like a ball, can have functions associated with that thing. For example, we might have a move() or show() function for a ball. For a computer game character we might have a function explode().  These functions, when associated with classes or objects, are sometimes called methods.


Let's see what this looks like in code. The following shows an example of a class which has both data and methods. You can see it has x and y coordinates for its position. It also has a show() method which draws a circle.


It is worth noting that the constructor() function is special. It is always called when an object is first created. It's the ideal place to initialise and set up the object. Here we set the x and y data.

We then re-wrote the code for our simple ball as a class blueprint, and created an instance of the ball with var my_ball = new Ball(). We then used the animation loop to repeatedly call the object's show() and move() functions to draw the ball and update it's position.

You can explore the code here  - (sketch). It is instructive to see where our previous code goes in this object oriented code.


Lots of Objects!

It might appear that we've written more code just to get a ball to move under the influence of gravity. The benefit is that we can create lots of instances of the ball blueprint very easily.

We saw how we can fill a list with newly created Ball objects.


Our example code had a list of 20 balls. In the code we simply iterate over the list at every animation frame to move and show the balls.

Each one of these 20 ball objects has its own position and velocity. To ensure they don't all follow the same path, we added a random element to the initial velocity in the constructor() in the class definition.

The result is rather pleasing!


You can explore the code here - (sketch).

The power of objects and classes is now clear.

We can easily create many objects from a single blueprint. You can see how this can be used to model many kinds of things, from flocking birds to creeping ants .. our imagination is the only limit.


Simple Examples

We looked at some simple examples, which share the same code structure, but model different scenarios.

The simple balls example can be adapted to model bouncing when hitting an edge to create the effect of balls bouncing in a jar.


The code is here - (sketch), and worth looking at to see how easy it is to extend the blueprint to include these new effects.

Once the blueprint is updated, all the balls benefit. This is good way to keep more complex coding projects tidy and manageable.

The next example was a simulation of fireworks, but the core element is the same as our balls flying under the influence of gravity.


Explore the code is here - (sketch). Most of the additional code is simply to style the moving balls.

Finally we looked at an example which wasn't based on objects moving under gravity, but moving according to Perlin noise.


You can explore the code here - (sketch).  It is useful to see which code is similar to all our previous example. The definition of a blueprint, the creation of many objects in a list, and then repeatedly calling methods on those objects, is the common pattern.


Thoughts

There are many algorithmic artists, and indeed scientists and engineers, who model the behaviour of many similar things. Using classes an objects is one common way of doing this elegantly.

Conceptually, the idea of being able to flexibly define "things" which have the characteristics of real or imaging things is nice. We can create, for example, dogs, which might have colour and name, and methods like run and bark.

This object oriented programming is popular, and is possible in many languages, from Python to Java, from Javascript to C++. The syntax and terminology might vary, but the concepts are similar.

In this session we introduced objects and classes. You can do much more with objects and classes, such as creating hierarchies of blueprints, but most algorithmic art is very effective with just the simple ideas we covered.

Wednesday 6 November 2019

Algorave!

As part of the Algorithmic Art Season 2019, we held an Algorave at the Fish Factory Arts Space, Penryn.


Algorave? Live Coding?

At a typical rave, a DJ selected pre-recorded music to play. At a live music performance, musicians play instruments live for an audience.

There is something magical and immediate about being in the presence of a real musician playing an instrument. It is a performance of the moment, a performance that is not like anything that happened before, or will happen again.

And a key part of the magic is that the musician is using skill, reacting to the instrument and the audience, and the music is subtly infused with the particular mood and state of the mind of the musician at that time. It is a very personal experience.

Sound isn't just created by pianos and violins, it can be created digitally with a computer. And a musician can instruct a computer to to synthesise and arrange sounds to make music. Those instructions are in a computer programming language, and the act of writing those instructions is often called coding.


Live-coding is writing code in the moment, with effects that are to be experienced immediately. So live-coding music is similar to a musician performing live with a violin or piano.

And when live-coding musicians get together and perform for an audience - it can be an algorave!


Fish Factory Art Studios

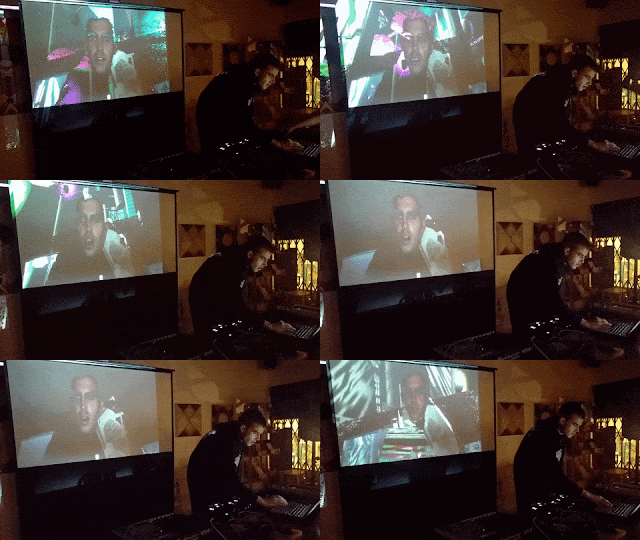
On the evening we gathered at the Fish Factory Art Studios in Penryn and experienced sets from Dave Griffiths, a pioneer of the algorave scene, Adam Russell and Barnaby Fryer.

Each set was very different in both musical style and also the software being used to create music.

Barnaby Fyrer orchestrated a rich and interesting soundscape that had the audience captivated and eager to hear what he was going to do next:


Adam Russell weaved a hypnotic and powerful soundscape threaded powerfully with a very relevant political speech.


Dave Griffiths performed the finale, a lively vibrant set using software he had written almost entirely himself. The interface itself is visual in showing what is being played, as well as being the means of control and composition.


Dr Norah Lorway is also a pioneer of the algorave movement, but sadly was unable to join us at this particular evening. You can hear her set, titled, This Is How The World Will End, from her previous algorave here - it is particularly sublime:


Thoughts

Algorithmic art is about creating art, in all its forms, from primarily logical or mathematical processes. Live coding music is very much in this tradition, and that's why we wanted to showcase this form of art as part of the Algorithmic Art Season.

We were very lucky to have such talented musicians share their passion with us. Everyone found the performances captivating, not only because there was a visual element accompanying the music, but because being in the presence of live performing musicians is always an immediate and personal experience.

I was particularly impressed with how everyone came together, the musicians and Rose's team at the studios, to make this wonderful evening happen, most of it with last minute changes of plan.


There was a a lot of interest and questions during and after the session, and I was encouraged that people wanted to hold algorave evenings again!


More Reading

Tuesday 29 October 2019

Solandra Hands-On Tutorial & Emergent Behaviour In Insects

This month's London meetup has two themes, a hands on tutorial on Solandra, a modern opinionated javascript framework for creative coding, and a talk on emergent behaviour in insects.


An overview of Solandra, including its rationale, documentation and examples, is here: [link].

A video of the talk on insects is here: [link], and slides here: [link].


Solandra Principles

James Porter is an experienced technologist and an algorithmic artist. Over time he became frustrated with the limitations and API design choices of Processing and explored other options. He looked at Quil, a Clojure wrapper for JVM Processing, but found it unsatisfactory. He then explored Kotlin, a more modern language that runs on the JVM. His journey ultimately led him to develop Solandra, a javascript framework that, importantly, runs in a web browser.


His experience of both coding and creative frameworks in particular, informed the principles he wanted his new framework to adhere to. You can read more here, but notable examples are:

  • coordinates independent of pixel size, width is always 1.0, height depends on aspect ratio
  • simple data structure for 2-d coordinates, usable in the form [x. y]
  • TypeScript to support coding via autocomplete and type checking
  • control flow / iteration over common drawing-level abstractions eg tiling, partitions, exploded shapes
  • rethink counter-intuitive API orthodoxy eg for bezier curves
  • minimal dependences and quick low-friction compile cycle
  • support agility to experiment and try new ideas

James has really thought about the most common things that developers do with frameworks like p5js but aren't as simple as they should be. A good example is Solandra providing a very simple time counter, avoiding the need to calculate it indirectly.

James consciously developed this framework to meet the needs of experienced coders, and didn't design for onboarding newcomers to coding.


Solandra Illustrative Examples

James led a hands-on tutorial working through key concepts. He used codesandbox.io a hosted environment with Solandra set up ready for use.

James provides several tutorials on his website (link), but here we'll look at a small number of examples that illustrate key design concepts for Solandra.

For the following illustrative examples, you can use Jame's codesandbox environment and modify the code as required: link.

On first loading, you should see the following page with sample code running:


We can edit the code, and it is automatically complied from typescript to javascript and executed, with the results appearing on the right.

All Solandra code implements a sketch function, the contents of which decide what is drawn or animated.


const sketch = (s: SCanvas) => {
  // write code here
}


You can see the syntax uses modern javascript for conciseness The object s is of type SCanvas, and is the context in which we change colours, draw shapes, and so on.

Let's illustrate by setting the background colour. This is done via the s object.


export const sketch = (s: SCanvas) => {
  // set background
  s.background(60, 80, 80);
}


You should see a light yellow coloured background.


This simple example illustrates who we operate on the canvas via the s object.

Let's draw a simple shape, a circle. In Soldandra, shapes are objects which we have the power to manipulate. We can choose to draw them, they aren't drawn by default.


export const sketch = (s: SCanvas) => {
  // set background
  s.background(60, 80, 80);

  // create circle
  const mycircle = new Circle({at: [0.5, 0.5], r: 0.2});
  // draw it
  s.draw(mycircle);
};


You can see we're first creating a new circle object and calling it mycircle. The parameters are concisely expressed and intuitive, the circle is centred on the canvas at (0.5, 0.5) and has a radius of 0.2. You should see a nice circle like this:


Very often we don't need to keep the object around for further operations so it is common to create the shape and draw it immediately, like this:


export const sketch = (s: SCanvas) => {
  // set background
  s.background(60, 80, 80);
  // draw filled circle
  s.fill( new Circle({at: [0.5, 0.5], r: 0.2}) );
};


You can see we've used s.fill() instead of s.draw() which draws a filled circle instead of the outline.


A very common task is to move over the canvas in regular steps and do something at those points. This is a basis for many works of algorithmic art. James provides a convenience function for iterating over one dimensional and two dimensional grids.

It is easiest to see the code:


export const sketch = (s: SCanvas) => {
  // Hue, saturation and lightness (alpha)
  s.background(60, 80, 80);

  s.forTiling({ n: 7, type: "square", margin: 0.1 }, (pt, [d], c, i) => {
    s.setFillColor(i*5, 80, 40, 0.4);
    s.fill(new Circle({ at: c, r: 0.05 }));
  });

};


Here the forTiling() function takes intuitive parameters, the number of grid subdivisions, the type of tiles, and size of the margin around the edge of the canvas. In return it creates variables which provide the position of each tile, its dimensions, its centre and an overall count. You can see we're using the count i to set a fill colour, and then drawing a circle at the centre of each imaginary tile.


Such iterators with callbacks that fill in useful variables are a key design element of James' Solandra. It is useful to think how much more effortful the code to achieve this tiling pattern in plain p5.js would be.

James has done a lot of thinking about bezier curves, which are intuitive to create interactively, in vector drawing tools for example, but are more difficult to code. Solandra makes it easier to imagine curves and translate that vision to code, by focussing on what's intuitive - the key points and the curvature of the curve between those points.

The following code, taken from one of Jame's online sample sketches,  illustrates the construction of curves.


export const sketch = (s: SCanvas) => {
  // Hue, saturation and lightness (alpha)
  s.background(0, 0, 50);

  s.forTiling({ n: 12, margin: 0.1 }, ([x, y], [dX, dY]) => {
    s.setStrokeColor(20 + x * 40, 90 - 20 * y, 50)
    s.draw(
      Path.startAt([x, y + dY]).addCurveTo([x + dX, y + dY], {
        polarlity: s.randomPolarity(),
        curveSize: x * 2,
        curveAngle: x,
        bulbousness: y,
      })
    )
  })

};


We can see a tiling iterator dividing the canvas into a 12x12 grid. A curve, Path(), is started at a point (x, y+dY) and as the iterator moves along the grid, subsequent points (x+dX, y+dY) are added to it. Each segment has its own parameters like polarity, curve size, curve angle (approx asymmetric skew), and bulbousness around the endpoints.


You can see that as the curves progress to the right, the curve size increases. You can experiment by changing those curve parameters to see the effect on the curves.

One interesting area of flexibility is that shapes are objects before they are rendered. That means they can be operated upon or subject to filters. The following shows an example of this.


export const sketch = (s: SCanvas) => {
  s.background(0, 0, 60);
  s.setFillColor(0, 80, 40, 0.3);
  s.lineWidth = 0.01;

  const h = new RegularPolygon({at: s.meta.center, n: 8, r: 0.2});
  s.setStrokeColor(220, 80, 40, 0.2);
  s.draw(h);

  const h2 = h.path.segmented
  .flatMap(e => e.exploded({ scale: 0.8, magnitude: 1 }))
  .map(e => e.rotated(s.gaussian({ sd: 0.1 })))
  .forEach(e => {
    s.fill(e);
  })

  s.lineWidth = 0.003;
  s.setStrokeColor(270, 60, 40, 0.2);
  s.times(40, () => {
    const h3 = h.path.curvify(
      () => ({
        curveSize: 1+s.gaussian({ mean: 0.5, sd: 0.5 }),
        curveAngle: s.gaussian({ mean: 0.0, sd: 0.5 }),
      })
    )
    
    s.draw(h3);
  })
  

};


You can see that we first create a polygon h with 8 sides, and it is drawn as an outline. We then create a new shape h2 from h. We do this by converting the octagon into paths and segmenting the shape. This collection of segments is exploded with scaling and rotated by a small random amount. Each item is plotted as a filled shape.

Finally we create a new shape h3 from h and this time the paths are converted from lines to curves, with some randomness in their curve size and angle. This is actually done 40 times using a times() convenience function.


You can see the octagon, the segmented exploded shapes, as well as the curves created from the corners of the octagon.

We can simplify the code to create a design using only the curves.


export const sketch = (s: SCanvas) => {
  s.background(0, 0, 60);
  s.lineWidth = 0.01;

  const h = new RegularPolygon({at: s.meta.center, n: 8, r: 0.2});

  s.lineWidth = 0.002;
  s.setStrokeColor(270, 60, 20, 0.1);

  s.times(300, () => {
    const h3 = h.path.curvify(
      () => ({
        curveSize: 1.0+s.gaussian({ mean: 0.5, sd: 0.5 }),
        curveAngle: s.gaussian({ mean: 0.0, sd: 0.5 }),
      })
    )
    
    s.draw(h3);
  })
  
};


The results are pretty effective.


Emergent Behaviour in Insects

We also had a talk by an invited specialist in insect behaviour, Alison Rice, founder of Tira Eco, a biotech startup working to develop more natural and sustainable approaches to waste recycling.

Given how much of algorithmic art is modelling or simulating how nature works, whether is it crystalline grown or the flocking behaviour of boids, I thought it would be interested to hear directly from a scientist working with insects directly.

Her talk was fascinating and energetic, and generated a lot of interest and questions.


Her slides include videos showing how maggots appear to self-organise once their population density increases around food. It is understood this emergent behaviour optimises overall group energy efficiency.


The emergent geometric forms are fascinating!


Thoughts

It was particularly exciting to see someone challenge the orthodoxy around APIs and coding patterns and design a modern framework for creative coding, based on the actual experience of developers who had started to hit the limits of popular frameworks like Processing and p5js.

Personally, I think not enough is done to actually design programming languages and the metaphors and abstractions they give developers.

One of my own needs, and of many others based on queries and web analytics, is for a creative coding framework like p5js or Solandra to output a vector drawing, in SVG for example. Perhaps this is a future project for me!


I was really pleased that the group was excited by having Alison, a specialist in her field, bring her more direct experience and expertise of the natural world into a group which very often models that world only code.

Feedback strongly suggested we do that more often!


References


Sunday 27 October 2019

Blender 3D Basics and Python Coding

This month's Cornwall meetup was a newcomer's introduction to the every powerful Blender 3D tool.


Jon's notes and references for the session are here: (pdf).


Blender 3D

Blender 3D is very powerful tool for creating 3d scenes. It has been around for 20 years and has grown in popularity, capability and quality.

It can be used to create 3d models and scenes, render them, animate them, use physics to control motion, and ray tracing for more realistic rendering. It can can do even more than the core function of 3d modelling, for example video editing and compositing. Until very recently, it included a game engine, but this was removed to focus more on its core strengths.

The amazing thing about Blender, a professional-grade tool, is that it is free and open source. This not only makes high quality modelling and rendering accessible - it also opens up the software for inspection, modification and enables a vibrant community to grow around it.

Jon Buckby is a designer and illustrator living in Cornwall who uses Blender to great effect. We were very lucky to have him provide a beginner's introduction to Blender, taking us through the process step-by-step. This was incredibly useful because Blender's interface has been intimidating for many years, and even with the recent modernisation, is still not entirely intuitive.

In this blog, we won't duplicate Jon's walkthrough, but instead use the knowledge he imparted to create a simple scene for new readers to be able to follow.

A key reason an algorithmic artist might explore Blender is that it has a Python interface, which means scenes can be created algorithmically. We'll also demonstrate this with the simplest example.


Simple Operations

When first launching Blender 2.80 the interface looks like this:


This shows a 3d scene with a pre-created cube. There are a huge number of menus and controls and buttons which can be intimidating - ignore them for now.

Click on the scene and then clicking on the cube shows how objects are selected, shown visually with a light orange border. With a trackpad, two fingers can be used to rotate our own view of the scene.

You can choose to set the view to be directly from the front, top, side etc, using the View menu like this:


After selecting the front-on view, ensure the cube is selected and then make a copy. We do this by right clicking the cube to bring up a context menu, and selecting Duplicate Objects:


This will create a second cube which floats around with your pointer. We can force it to move along a single direction by pressing X, Y or Z for the axis we want to enforce. By pressing X it will only move directly to the left or right of the original cube. Once it is to the right of the original clicking will set its place.

We can select multiple objects using the Shift key. Select both and move the viewpoint around so we can see the cubes at an angle.


Let's now add a sphere. Go back to the front view and use the Add->Mesh menu to add an ico sphere. If you're interested in the difference between a uv sphere and an ico sphere, here is a discussion: link.


The sphere will be added but you might have to look closely to see that it falls where the cube is. To move it we press the G key. Press X and Z to move it along and up so it is above and between the two cubes. Blender users quickly adopt key shortcuts to speed up their working, and you'll also start adopting them for the most common tasks.

Rotate the view to see all three objects from an angle like this:


Let's take a look at the scene from the view of the camera, which you might have noticed floating in the scene as a wireframe pyramid-like object. Use the View menu to choose Viewport->Camera.

We now see the scene from the perspective of the camera.


The objects are close to the camera and so a little cropped. We could move the camera, or move the objects back, or scale them to a smaller size. Let's do the latter as it is a new operation. Select all the cubes and spheres, by shift-clicking them, or choosing them in the scene collection at the top right of the interface. Then press S to scale the objects by moving your pointer. Once they fit nicely in the view, click to finalise.


Let's render the scene. What we've been looking at is just a quick preview. When we have the scene arrangement as we want it, we ask Blender to take more care over how it colours the objects, taking into account colour, texture, lighting and shadows.

Select Render Image from the Render menu. After a short pause, a new window will pop up with the rendered image. We can use the Image->Save menu to save the image if we wanted to export it.


The rendering does take into account light and shade. We can see the sphere casts a shadow onto the cubes. But overall the image isn't that exciting.

Let's add colour to the objects. To do this we need to think more broadly about the material applies to the surface of the object, which can have many more properties than just colour.

With the sphere selected, choose the material view on the right hand view of options. Add a new material as shown:


Once a new material has been created, we see it has many options for how it behaves and appears.


Change the Base Colour to a bright red. Try changing the Metallic property to be around 50%, as shown:


Render the image again. This time we can see the sphere is now red and shiny as if it was metallic.


We can select the two cubes together and apply a new material to them both. Let's try a green colour but keep the metallic nature at zero.

Here's the resulting rendered image.


That sphere doesn't really look like a sphere. You can clearly see it is made of triangles. Almost everything in Blender is made of flat surfaces, and to approximate curved objects we increase the number of such flat surfaces.

In Blender, we can subdivide these triangles after the sphere has been created, but a good habit is to create the sphere with a higher number of triangles in the first place. Delete that sphere and add a new one. When you do, you'll see in the bottom left a window showing the number of subdivision to do when creating the sphere. Increase it to a higher number like 6:


Move the sphere to where it should be. You can scale it using the S key. Re-apply the metallic red material we created earlier. Rendering the scene now has a smoother sphere.


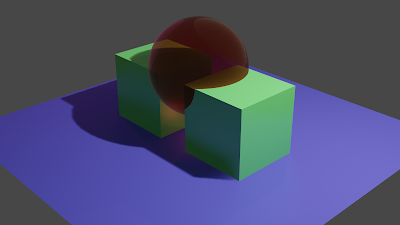
Now that we have the basics of how to create, move, scale and add materials to objects, it doesn't take long to create translucent materials, broaden the light source to create softer shadows, add a plane .. to give a more interesting scene.


What we've touched on here is just a small amount of what Blender is capable of.

The community around Blender is large and vibrant and you'll be inspired by the wide variety of creations, and also find help in the many tutorials and forums.

Jon referenced several websites, particularly those focussing on sharing pre-prepared models.

Jon also briefly introduced us to creating animations, compellingly illustrated with a physically realistic cloth falling under gravity.


Constructing Scenes with Python

Blender has a Python interface, which means you can extend it with code you've written in Python. This can take the form of transforms applied to objects or the scene.

We'll keep things simple enough to see how Python can be used to create objects algorithmically in a scene.

Start a new scene in Blender and delete the starting cube so there are no objects in the scene, apart from the camera and light. On the top row menu on the right is Scripting. Select this and the view changes. Click New to create an empty source code (text) file for our Python code. Your view should look like this, with the scene preview now smaller an at the top left, and the empty text file centre-stage:


In the empty file, let's write our first code. Type the following:


import bpy

# simple cube
bpy.ops.mesh.primitive_cube_add(location=(0, 0, 0), size=5)


The first line imports the Blender Python interface. The next line starting with # is a comment, ignored by Python. The last line uses the bpy module to add a cube. You can see the logic - add a mesh of type primitive cube. The parameters are the (x,y,z) location and size.

Your code should look like this:


Click Run Script at the top right, and a cube should appear in the scene.


Although this might not seem like much of an achievement, what we've done is pretty powerful. Instead of using the pointer and menus to manually create objects, we've used code. This opens up a whole world of possibilities because with code we can easily create many objects and use calculations to decide how they are placed according to an algorithms. Algorithmic animation is also possible but we will stay focussed on our simple example here.

Let's use Python to demonstrate this. Have a look at the following still simple code.


import bpy

for x in range(-6, 6, 2):
    bpy.ops.mesh.primitive_cube_add(location=(x, 0, 0), size=1)
    pass


You can see we create a loop counter x which starts at -6 and increases to +6 in steps of 2. We then use this variable x to place a small cube at (x, 0, 0). You can see the results, six cubes in a line along the x axis.


Let's introduce some maths. We can adjust the position of the cubes using a sine wave.


import bpy
import math
import numpy

for x in numpy.arange(-6, 6, 0.5):
    y = math.sin(x)
    bpy.ops.mesh.primitive_cube_add(location=(x, y, 0), size=0.5)
    pass


The above code uses the sine() function to calculate a shift along the y-axis for each cube. The cubes are smaller and placed more frequently along the x-axis using numpy.arange() which can count in fractional steps.

The results are starting to look pretty interesting!


Let's extend the cubes in the z-direction, again using a sine wave, but this time use a calculation to diminish the amplitude of the wave.


import bpy
import math
import numpy

for x in numpy.arange(-6, 6, 0.3):
    for t in numpy.arange(0, 6, 0.3):
        y = 2 * math.sin(x) / (1+t)
        bpy.ops.mesh.primitive_cube_add(location=(x, y, t), size=0.3)
        pass
    pass


This time a nested loop is used to count a variable t, which we use as height in the z direction. The wave amplitude is now doubled by divided by (1+t) so the amplitude gets smaller further up the structure.


That's pretty effective - and we can see how using code is a very powerful way of creating objects and scenes.

There is lot that the Python interface allows us to do - but we won't cover that here.

Instead we'll manually add more lights to the scene and render it.


The results are pretty effective given the simplicity of the techniques we've used - creative and moving cubes, giving them a material, adding lights, and using code to create many cubes algorithmically.


More Reading

There is no doubt Blender is a powerful tool, but it is also difficult to learn. Luckily there is a large community around it providing tutorials and support.